Best Style of the Week – DIY Tutorial

Hey beauties!

Today I’ve got a video tutorial of the best voted style from last week. To recap, here’s a look at all of the styles from last week as well as what the top looks were.


Here are the top two voted styles from last week
Best Style

Second Best Style

Today’s tutorial is for the best voted style. I didn’t have time to do a twist out over the weekend to show you all how I got the second best style which was a twist out updo, but I will try to get that in for you later in the week. 

So, to see how I got the best voted style from last week click here!

My Eyeshadow Staple 

Good Morning beauties!

Today I wanted to share some insight on a staple beauty product of mine. I get a lot of questions about whether or not I’m an MUA which is extremely flattering! However, I am just a beauty lover who enjoys playing with beauty products. But, when it comes to my eyes which are very large and expressive in case you hadn’t noticed (lol) I use just one product to achieve different pops of color. BH Cosmetics 2nd Edition 120 Color Eyeshadow Palette is it!


This bad boy has some gorgeous colors that challenge my creativity daily. And, you all know how much I just love to challenge my creativity. 


The colors are very pigmented and help me form some great looks. 

Edit


There are 3rd 4th and 5th Editions available but I’m still having tons of fun with this 2nd Edition Palette that I’ve had for over a year now, as you can probably tell (lol). You can get either of these Editions for just $16!! I highly recommend it. 

That’s it for now! Muuuaahh!


Stretched Hair vs Straight Hair

The majority of the time I style my hair when it’s completely stretched and completely dry. However I do also enjoy styling my hair when it’s straight. Both textures allow for distinct looks that allow me to achieve unique eye catching styles. Today I want to take a look at the major differences between my stretched and straight styles and give you all some insight on what my preference is and why. 
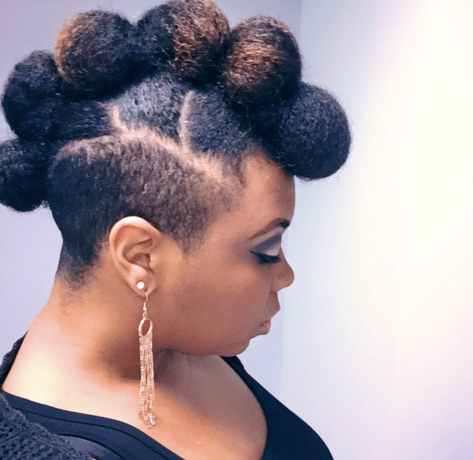
Stretched Hair

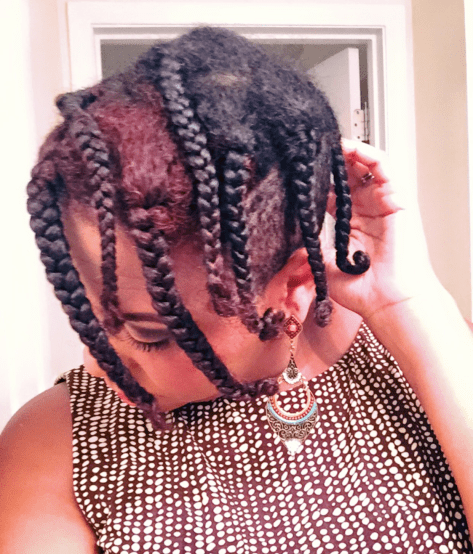
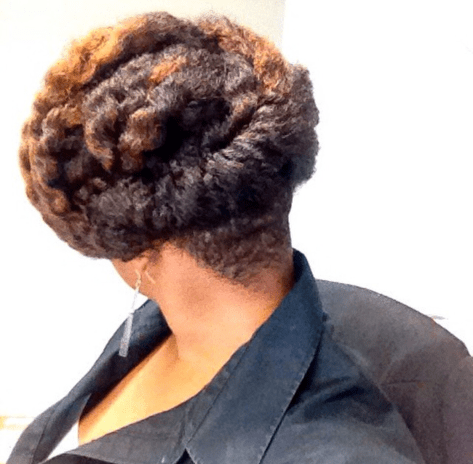
First things first, the preparation for my stretched hair takes a bit of time but isn’t necessarily a lot of work. You can find the detailed process in how I stretch my hair heat free here. The photo below is of completely dry completely stretched hair prior to my most recent hair cut.


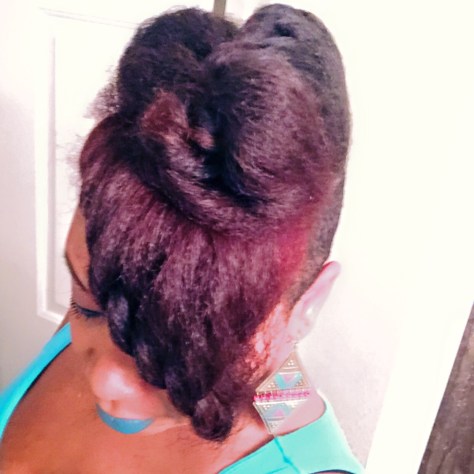
Stretched hair allows for flexible styling with shapes and dimension. I almost always wear updo’s so although it doesn’t necessarily seem like I’m benefiting from the length I get with stretched hair, I really am in the shapes I’m able to create.
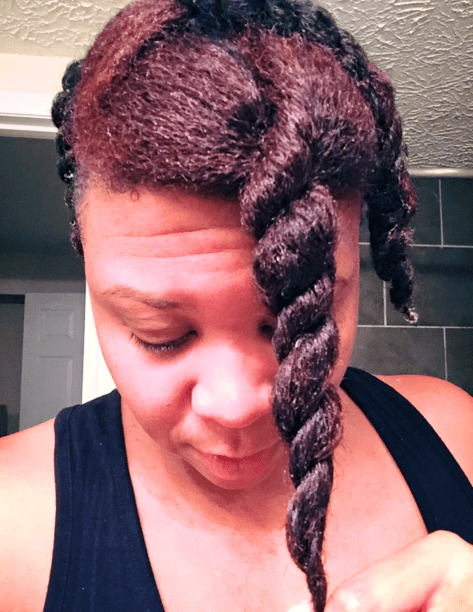


Straight Hair

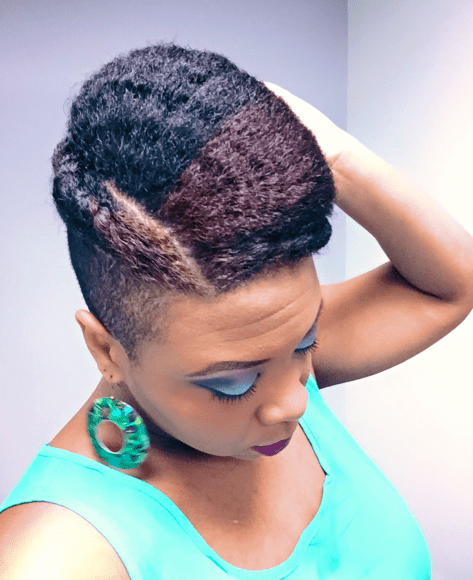
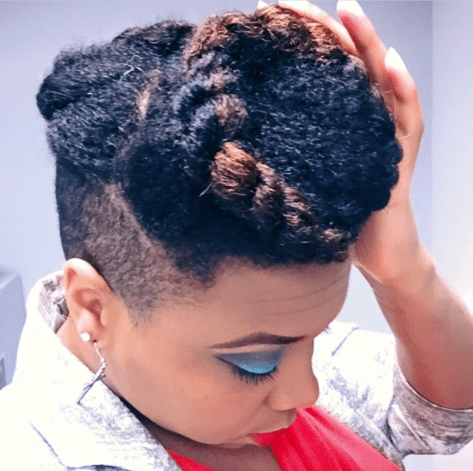
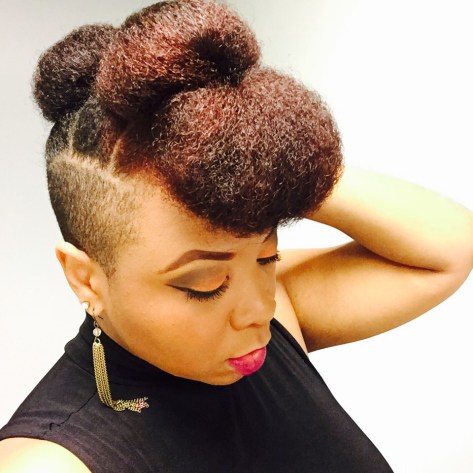
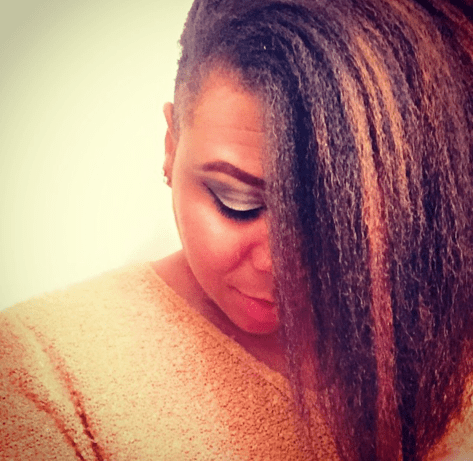
The straightening process for my hair is quite lengthy and requires a lot of work. I don’t have a video on the process but I’m sure you can imagine what goes into straightening natural hair. Below is a photo of flat ironed hair after my most recent hair cut.


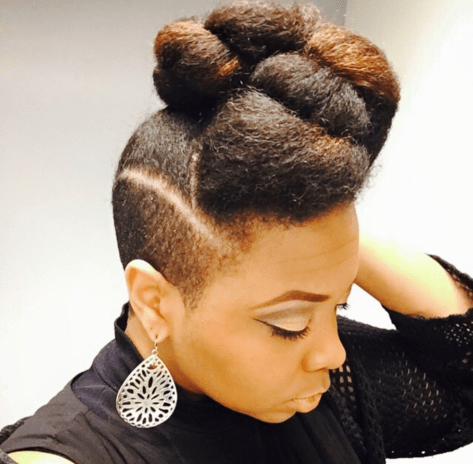
Styling my straight hair can be a lot of fun when I’m playing with flat twists. The styles always appear incredibly intricate and tend to get a lot of attention. I very rarely however wear my hair down when it’s straight. 


Either way, stretched or straight, I always have the ability to try out new creative styles with my hair. Having that opportunity within the versatility of my natural hair is a huge overall b benefit to natural hair.

As for preference, 9 times out of 10 I would take my stretched hair over straight hair. For me personally, it takes too much time to get my hair straight and too much maintenance to keep it that way (especially in the warmer months). Additionally, after 2 or 3 flat twist styles I’m totally bored with my straight hair. At the end of the day I can do so much more with texture! 


My Tried & True 

Way back when, before the days of cost efficient product sampling with FULL SIZE products from my curlBOX subscription there was one brand I knew I could always count on.   Cleansing, conditioning, moisturizing, no matter what I needed to do to my hair this brand had a product I could use to accomplish it effectively and at some of the most cost efficient prices in the market. No matter how many products I try this brand will always be a part of my product collection. Cantu, my tried and true.

Last night I used some great products from this brand to co-wash, condition and set my hair for a braid out.


After cleansing my hair with the co-wash I applied my all time favorite leave-in conditioner. This stuff  has never failed me on delivering excellent moisture to my hair.


After letting the conditioner sit for about an hour I followed this up with their curling creme and prepped my hair for a braid out. 


A braid out prepped with any other product I would probably put a little oil on my hands to help with moisture as I unravel the braids. Using Cantu products that step is totally unnecessary. Check out how juicy my hair is!


It is full of moisture and the definition is beautiful! of course I couldn’t just leave my hair like that, I had to put it up. So….here’s the creation for today. 


All of this awesomeness compliments of Cantu Beauty Products, my tried and true! 

Perfect For Twists & Edges

Good morning Luvs!

Today I wanted to share with you all two products that I am absolutely loving for twisted styles and taming my edges. 

So, you all know how much I adore twisted styles. There are a couple of different variations of twists I like to work with. One is a loose chunky twist that helps me achieve great dimension and the second is more secure twists that I often use to form different shapes like I talked about yesterday. 

I’ve found myself wanting to experiment more with secure twists and the product I am absolutely loving for those styles is Dark & Lovely’s Easy Twist Gel ‘N Butter. 


I was introduced to this product in my February curlBox and I’ve been loving it ever since. It is amazing for making my twists look nice and moisturized with a light but secure hold. It is literally the perfect blend of gel and butter. 

Although I’m not big on extremely tamed edges (I love my texture), I have started trying to play with slightly tamed edges. For that I’ve found that Creme of Nature’s Perfect Edges works great!


I was also introduced to this product by curlBOX in the most recent MAY-KOVER box. Probably the best thing I love about this product is how smoothly it spreads and the shine! LOVE! 

I used both the Easy Twist Gel ‘N Butter as well as the Perfect Edges on today’s hair and adore the results. I’ll definitely continue using these two products perfect for twists and edges :o)


2 Ways To Use Shapes With Your Next Updo

Hi luvs!

Today I want to talk a bit about shape an angles when it comes to hairstyles. In my YouTube video 3 Keys To Developing Creative Styles which you can watch here, I talk about how embracing shape and angles opens up more opportunity for styling options. 

Here are the two main shapes I tend to embrace to come up with unique looks:

1. Circles: you might not realize it but circular styles are easy to come up with, outside of a typical halo/crown braid or bun. Here are a few different styles where I embraced a circular shape or rounded edges. 


2. Triangles – triangular shapes allow me to achieve some really unique looks up front and they tend to be really bold. Take a look at these styles where I embraced a trianglular shape


The easiest way  to achieve these circular or triangular looks is by using 1 or more sections of twisted hair and pulling and pinning them until they form the shape you’re looking for. You can also try to just form the hair into the shape and secure with bobby pins along the way, but this is a bit more difficult. 

That’s it beauties! Try embracing one of these shapes with your next experimental updo and see where you end up.

Muuuahhhh!!!

Soft Bouncy Defined Curls

Hi Beauties!

Who doesn’t love big soft bouncy defined curls!? I was so excited to have successfully achieved this type of curl this weekend. Take a look at these gorgeous curls! 


How’d I do it? Well….I set my hair with flexi rods using the Creme of Nature Style & Shine Foaming Mousse I got in my May curlBOX.  I used 7/8″ and 6/8″ flexi rods, both 10″ long. I used the smaller rods in the front and the larger rods in the back.

I installed the rods by starting half way down each section of hair, wrapping the bottom half around the rod and then rolling the rod the rest of the way up.


I kept the rods in overnight and removed them in the morning. My hair was extremely soft! So much so that I was afraid of losing curl definition. NOT the case.


I separated each curl 2 or 3 times and added no additional product. So in love with these results!


My New Hair Color

Hi Luvs!

I’m so excited to share my new hair color with you beauties. The May curlBOX was filled with a bunch of goodies by Creme of Nature including the new Intensive Red hair color. 


You can check out my complete product review of all the products in the box here.

So, I decided that I just wanted some pops of color so I didn’t saturate my hair in the color. I did a big chunky section in the front and added some color to the ends of my hair in the back.  


This was my very first time coloring my own hair. It was fairly simple and I would definitely do it again. I am in love with the results!! It’s subtle enough for work, but still gives me the pop of color I was looking for. 


Here are some styles that really allowed my new color to stand out.


What do you think??

Fearlessly Authentic