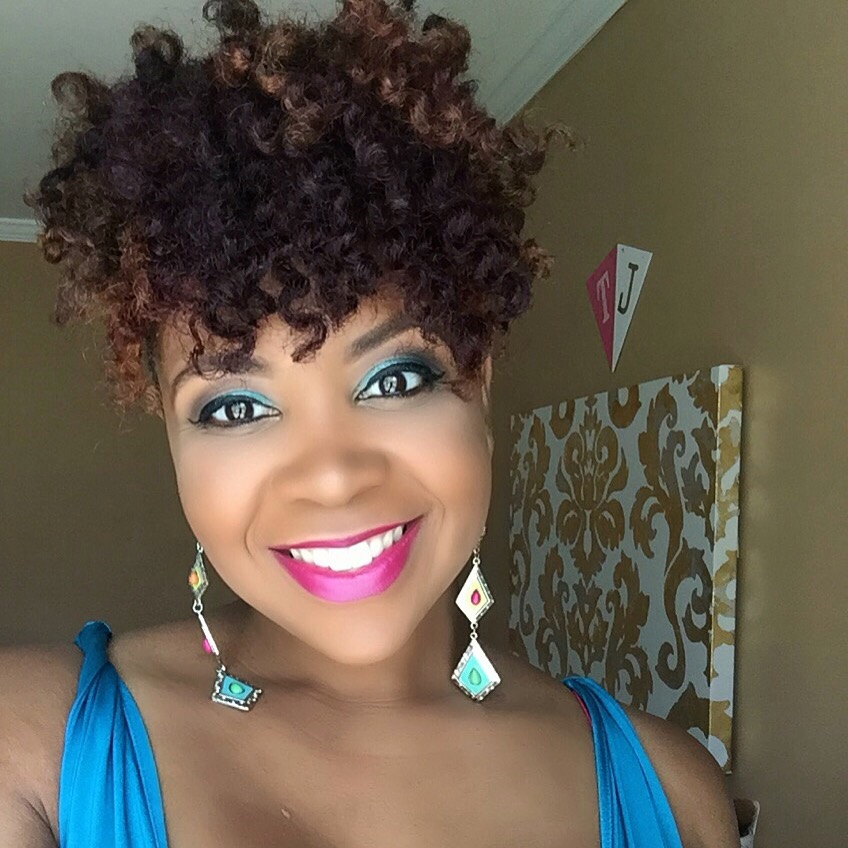
Real Techniques Miracle Complexion Sponge

Good morning Beauties,

Today I wanted to share a beauty product that I’ve recently tried and am loving!  If you’re anything like me and do not clean your makeup brushes every day (I clean mine weekly) finding a brush to apply your foundation daily without a ton of product buildup can be tough. I know all about this struggle! From the standard flat foundation brushes to the round flat foundation brushes, the product buildup in the brushes just makes the application process thick and not at all smoothe. That’s what lead me to Walgreens in search of something else. 

And because Walgreens never disappoints me, that’s where I came across the Real Techniques Miracle Complexion Sponge. The #1 branded makeup sponge!

  
I hadn’t previously tried a product like this so I was anxious to see if I experienced the same thing.  I am so excited to say that despite applying my foundation every day for a week without cleaning the sponge, my application process does not at all feel thick or cakey with this product. It’s also super easy to clean. I just use soap and warm water.

Although I primarily use this product to apply/blend my foundation, you can also use it to highlight & contour.

  
The flat edge side also works really well for perfecting. 


I am seriously loving this product! Of course I have a demo for you. If you’re interested in seeing how I use the Real Techniques Miracle Complexion Sponge click here

XOXO

~TJ

Advertisement

My Go To Protective Style

Good morning luvs,

I’m super excited that my family and I will be traveling home to Florida for a the long Memorial Day weekend and my first Fearless Textures event which is this Saturday (Ahhh! 😝). I’ve got a lot of preparing to do and didn’t want to have to worry about my hair leading up to the event so, I decided that it was time to bring my go to protective style back, mini twists.

  
I absolutely adore mini twists. Not only are they super cute they are extremely low maintenance and still allow me to work with my own hair.  I’ve never been a wig, weaves, box braids, etc kinda girl. Mini twists have been my protective style preference since I’ve been natural. I can style them up or just let them hang. Either way, they are beautiful!


Want to see what I use and how I install my mini twists? Click here

XOXO

~TJ

New Brow Favorites

Good morning beauties!

Nothing puts a face on point like great brows and a bold lippie. I love trying out new brow products and lippies. Lately I’ve tried out a few new brow products and have settled on the two I’m going to talk about today as my favorites.

Here they are! Brow This Way Gel by Rimmel London and Milani Stay Put Brow Color. Both of these products are inexpensive but amazing and you can find them both at my favorite drug store, Walgreens.

  
I adore using these products together. Here’s my usual step by step

1. Line my brows with a brown pencil by Jordana Cosmetics 

2. Fill in my brows with the Milani Stay Put Brow Color. It’s really thick in consistency and the brush it comes with is nice and sturdy

  
3. Lastly I go over my brows with the Rimmel Brow This Way Product. This product goes on wet which was a bit odd for me initially but when it drys it provides such a nice finish.

  
Together these two products help my brows stay on point. Today’s makeup look is staring these great brow products and this bold Milani Cosmetics lippie in the color Matte Iconic


Well, that’s it for now!

XOXO,

TJ

Casual & Comfy in Calvin Klein

Happy Monday!

So, a couple of weeks ago I took a trip to Marshall’s one of my absolute favorite places to shop for shoes! They always have such a great selection. Well, I happened upon these casual Calvin Klein shoes and they totally caught my eye

  
I loved the color but what really got me is how incredibly comfortable they were! For just $30 I had to get them. Since then, they have been my go to shoe for casual comfort.

  
Here’s a look at how I’ve been styling them.


LOVE these shoes. I’ll definitely be wearing them throughout the spring & summer. Well, that’s it for now!

XOXO,

~TJ
 

Pin Curl Bun Hawk

Happy Friday luvs!

Late post today but I’ve got a DIY tutorial for a nice updo that works whether you have an undercut or not. It’s also very versatile. It could work for a formal event or just as a casual style. Check out this pin curl bun hawk
  

If you’re interested in seeing exactly how I got this style check out my quick tutorial here.

Well that’s it for now! Have a great weekend!

XOXO

~TJ

Faux Bangs & Pin Curl Bun

Hey luvs!

Ya’ll know how much I love updos. What you might not know is how much I adore bangs! Yes, bangs. My love for the look isn’t constant but when I do want to wear the style I opt for these super cute faux bangs


I love this look. And yesterday I decided to pair it with a pin curl bun.


Pin curls are an easy way to make a bun more fun and creative. Of course I filmed a tutorial for this style. If you want to see exactly how I got it click here. That’s all for now! But first, a few more pics.


Fearless Textures Tour

Hey luvs!

Today I wanted to talk a little about the event tour I’ll be having this year. One of my biggest goals regarding my brand this year is to meet some of my followers/supporters. I engage with so many of you on such a regular basis that I really want to see you! So what I decided to do was set up some opportunities to make that happen.  

Rather than just having a typical meetup I decided to put more purpose behind these events. You all know that I am all about fearlessness and inspiring you all to be fearless, hence the name “Fearless Textures”

With these events you’ll have the opportunity to ask me questions, get inspired in a more intimate setting and win lots of prizes! Plus I’ll be making a big announcement at my first event for the tour which brings me to the schedule. Here is where I will be and when

Tampa – May 28th

Atlanta – August 6th 

New York – September 3rd

Tickets for my Tampa event are available here.

I am soooo excited about the opportunity to spend time with you all. If you are in or around any of these cities please come out!

Stay tuned for more info on my Atlanta & NY events

XOXO

~TJ

Curly to Stretched Creative Styling Overnight

Hi luvs!

So, you all know how I adore styling on stretched hair. It really allows me to be more creative. However, as part of my hair restoration regiment I’m having to give my hair a lot more moisture which means more curly styles. Curly styles don’t last more than 3 days for me.  After that, I’m ready to get back to creative styling.  But how do I get my hair from curly to straight heat free without losing a day.  Well…I’m going to show you exactly what I do to go from a head full of curls one day to a creative completely stretched updo the next, without washing my hair and still giving it the moisture it needs.

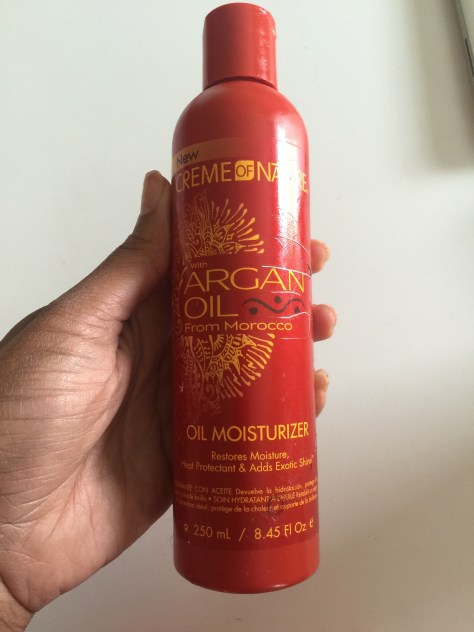
Here are the four products I use to make it happen:

  1. Creme of Nature Argan Oil Strength & Shine Leave In Conditioner
  2. Creme of Nature Argan Oil Oil Moisturizer
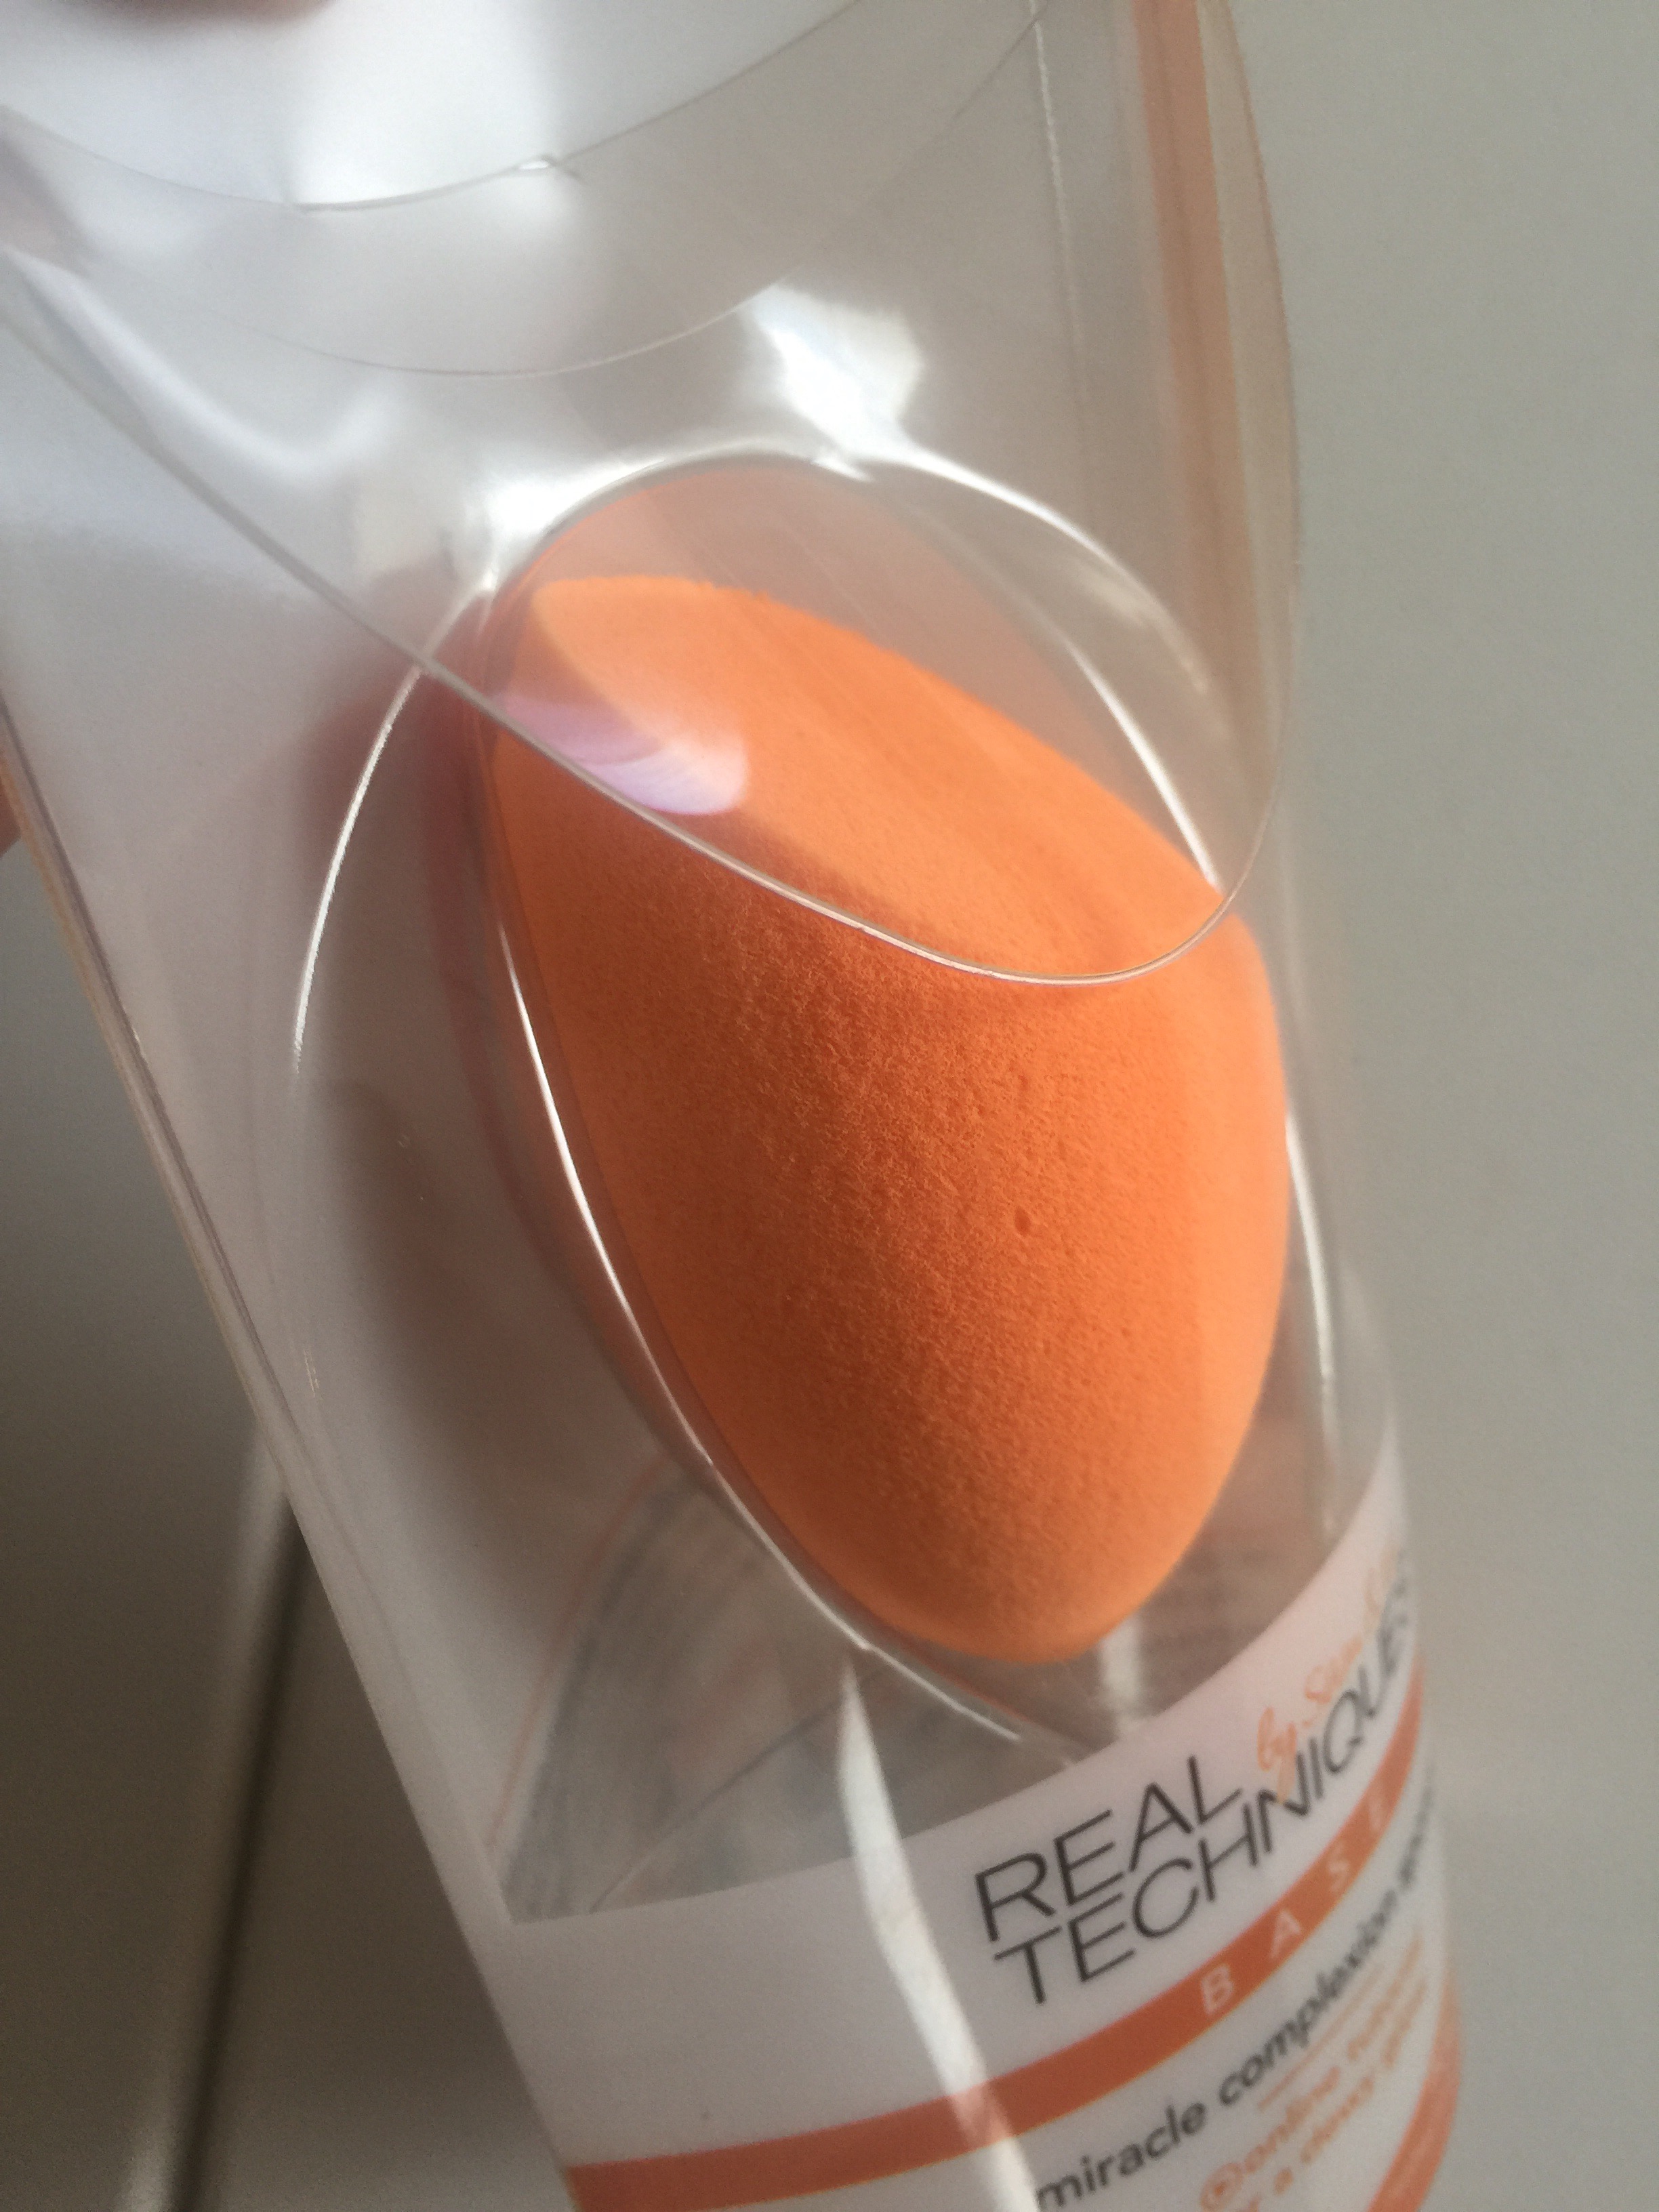
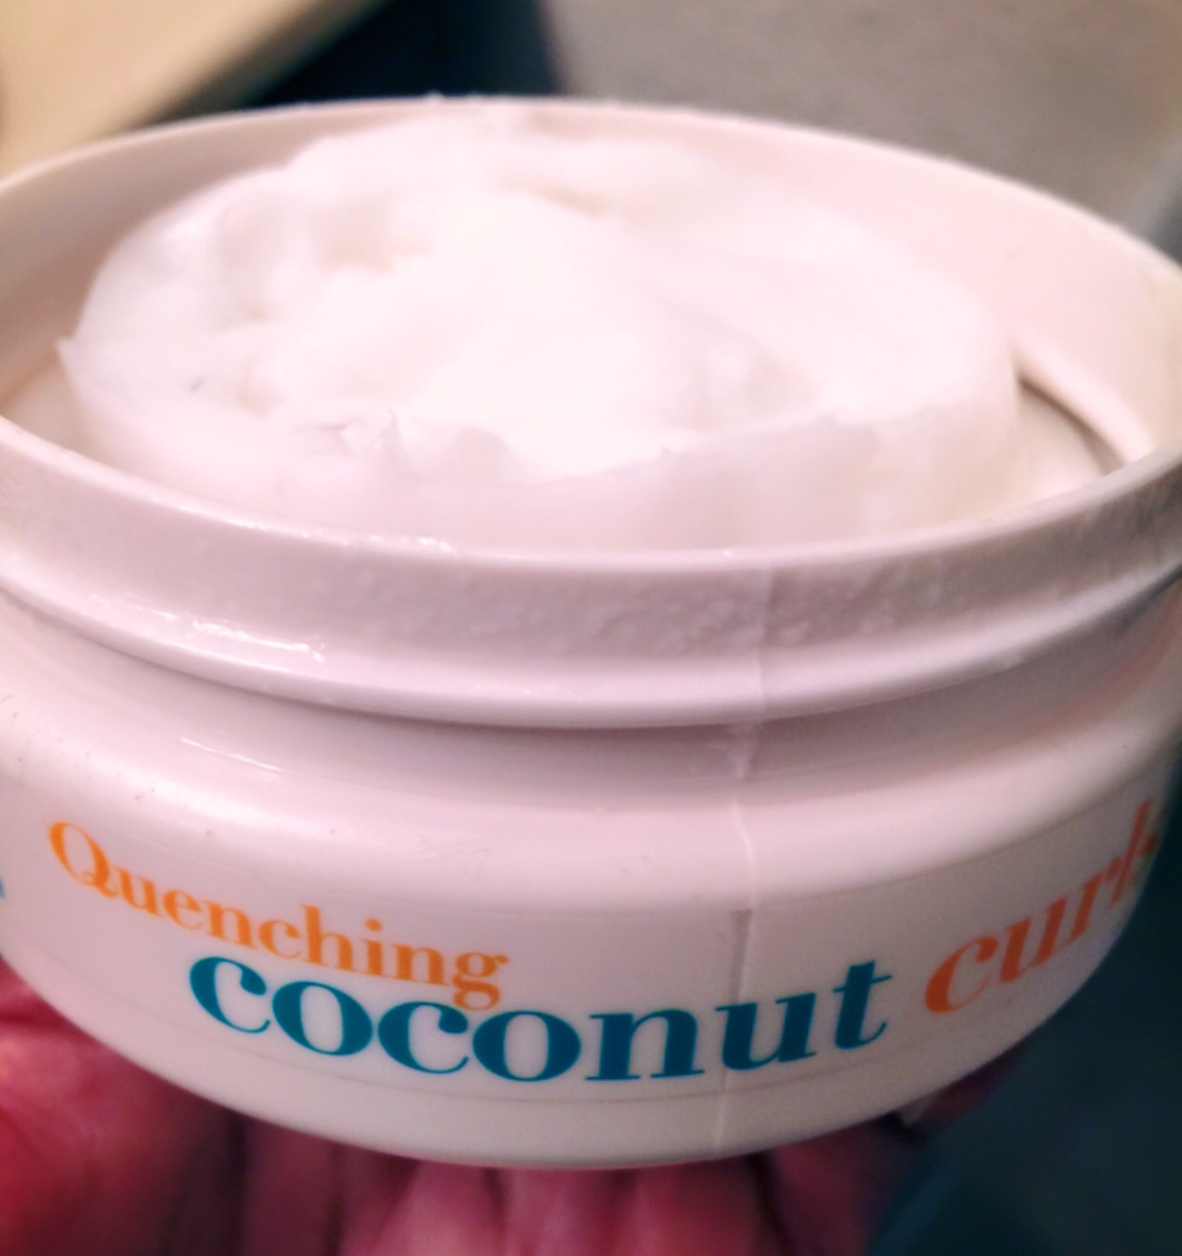
  3. Creme of Nature 100% Pure Argan Oil
  4. Felicia Leatherwood Detangler Brush

I typically purchase my Creme of Nature Products from Walgreens.  They’re almost always on sale there.

IMG_9299 (1).jpg
First I start out with my old twist out, section my hair into three sections and apply the leave in conditioner to each section detangling with my Felicia Leatherwood Detangler Brush as I go


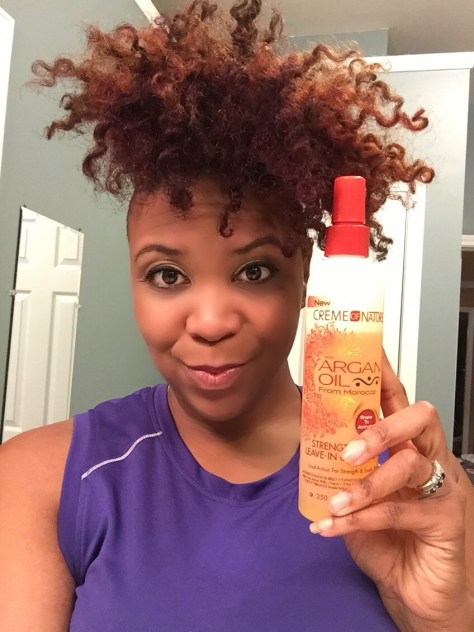
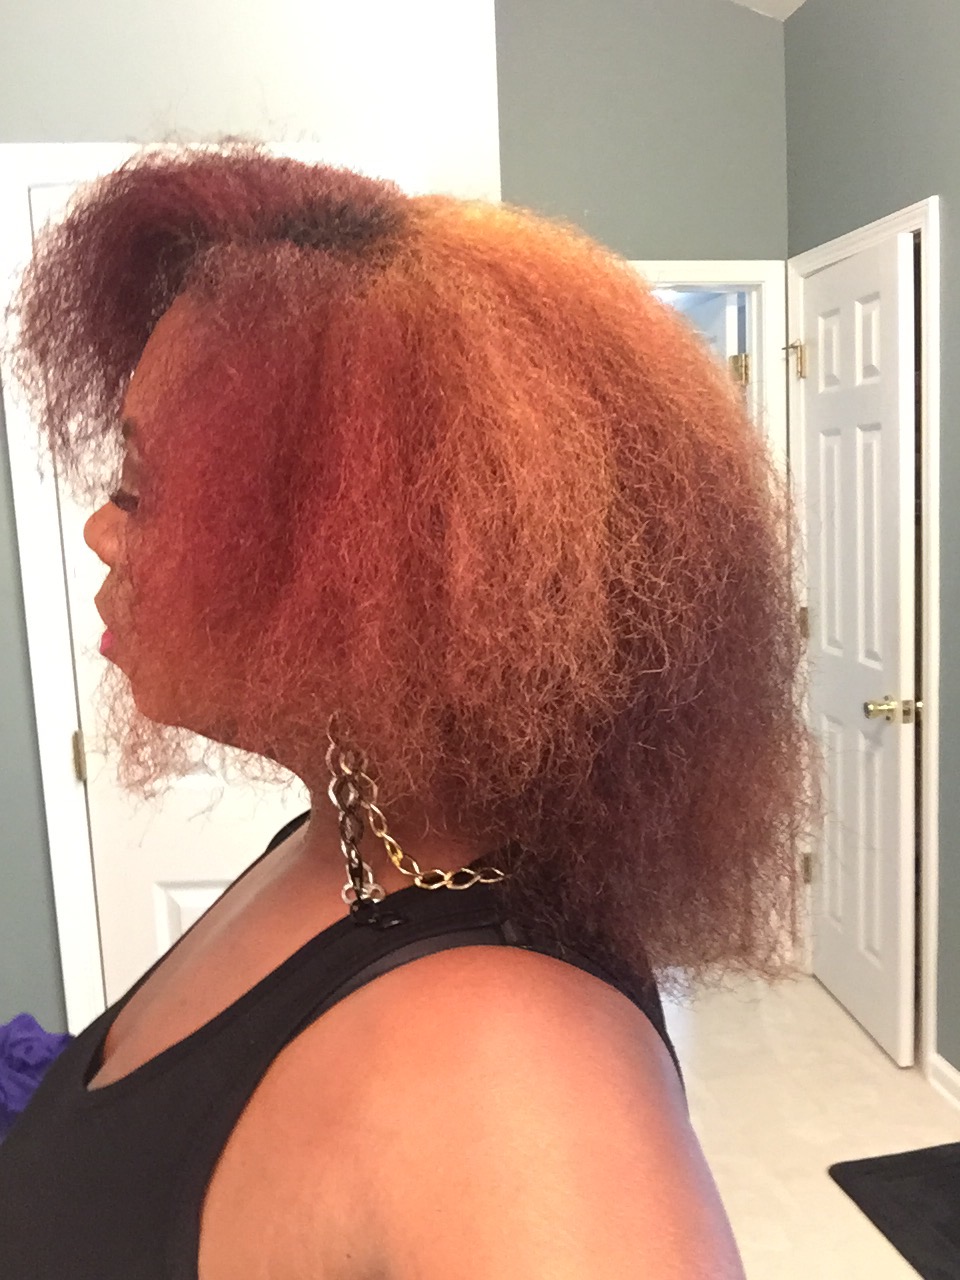
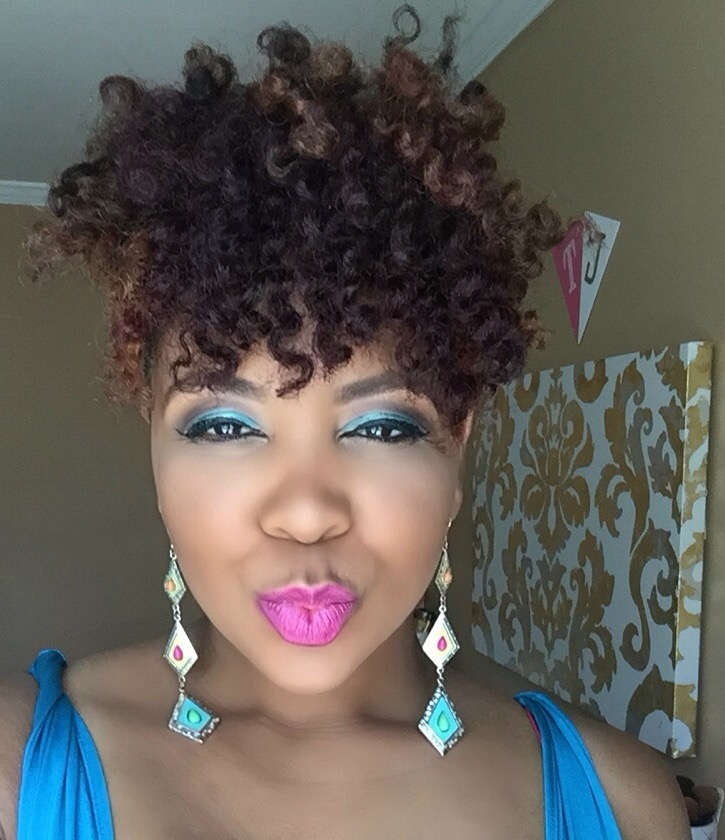
I make sure to saturate each section with the product so that it touches each strand.  This also makes it easier to detangle.  Once I’m done my hair looks like this. My hair is soft fluffy and moisturized.


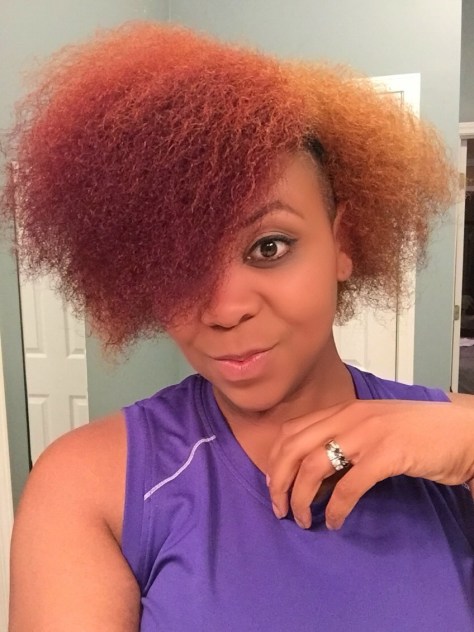
You can see it’s starting to stretch, but it’s not quite where I like for it to be for my stretched hairstyles.

Next I apply the 100% Pure Aragan oil to my hair and after that I lock it in with the Oil Moisturizer.

IMG_9307IMG_9305

Once I’ve applied all of the products in my hair I use my Detangler brush to smooth out my hair. This is really important because it helps to really disrupt my curl pattern and stretch my hair.

I then pull all of my hair into a fairly tight ponytail. This is going to allow my roots to stretch throughout the night.


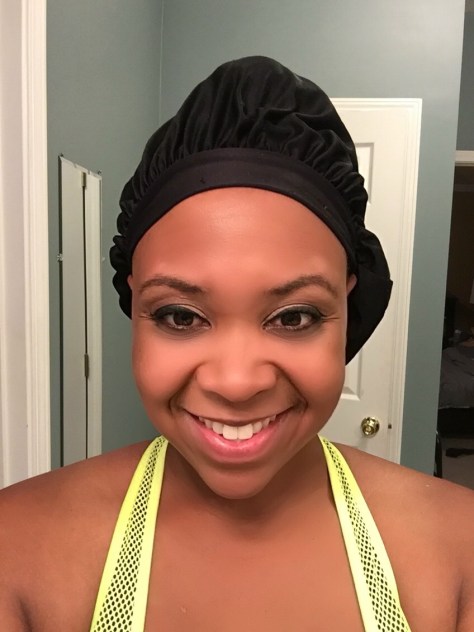
Next, I split the ponytail into two sections, twist each section tightly and pin them down. The tight twists will allow my hair to also stretch throughout the night.


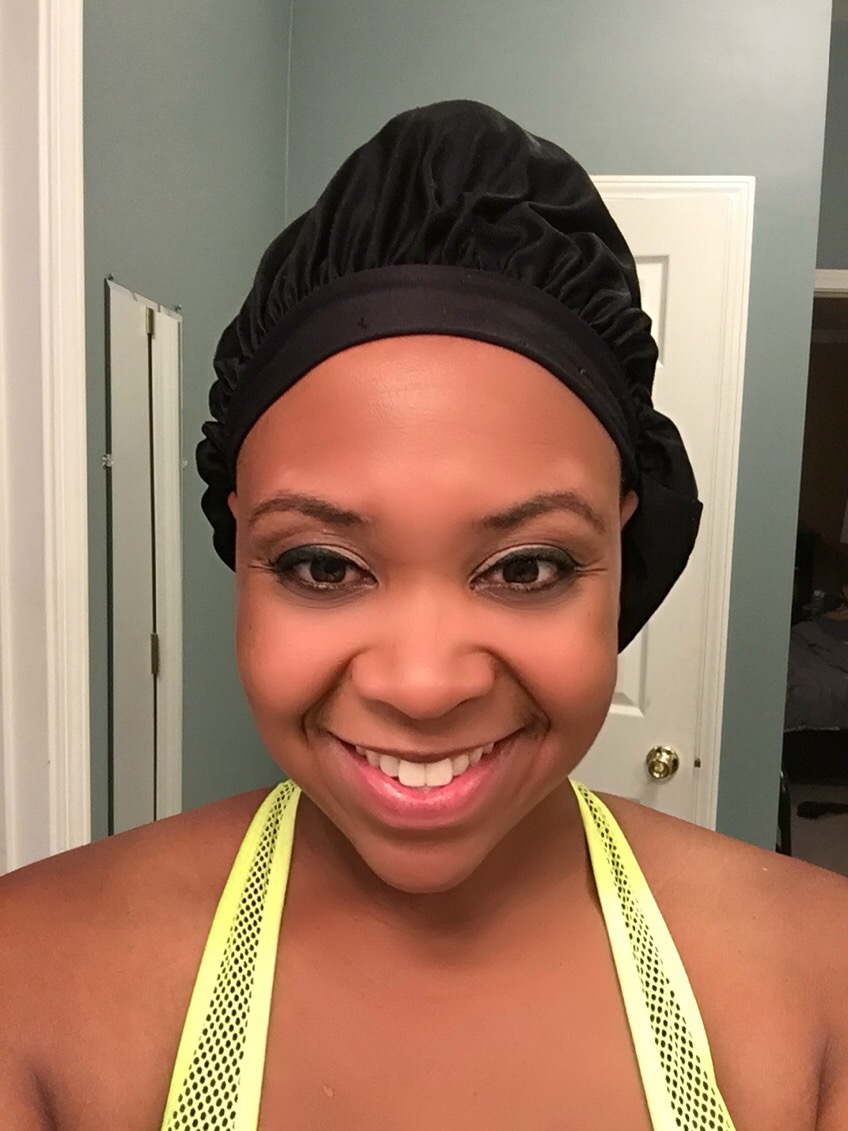
Then, I put on my satin  bonnet and go to sleep.


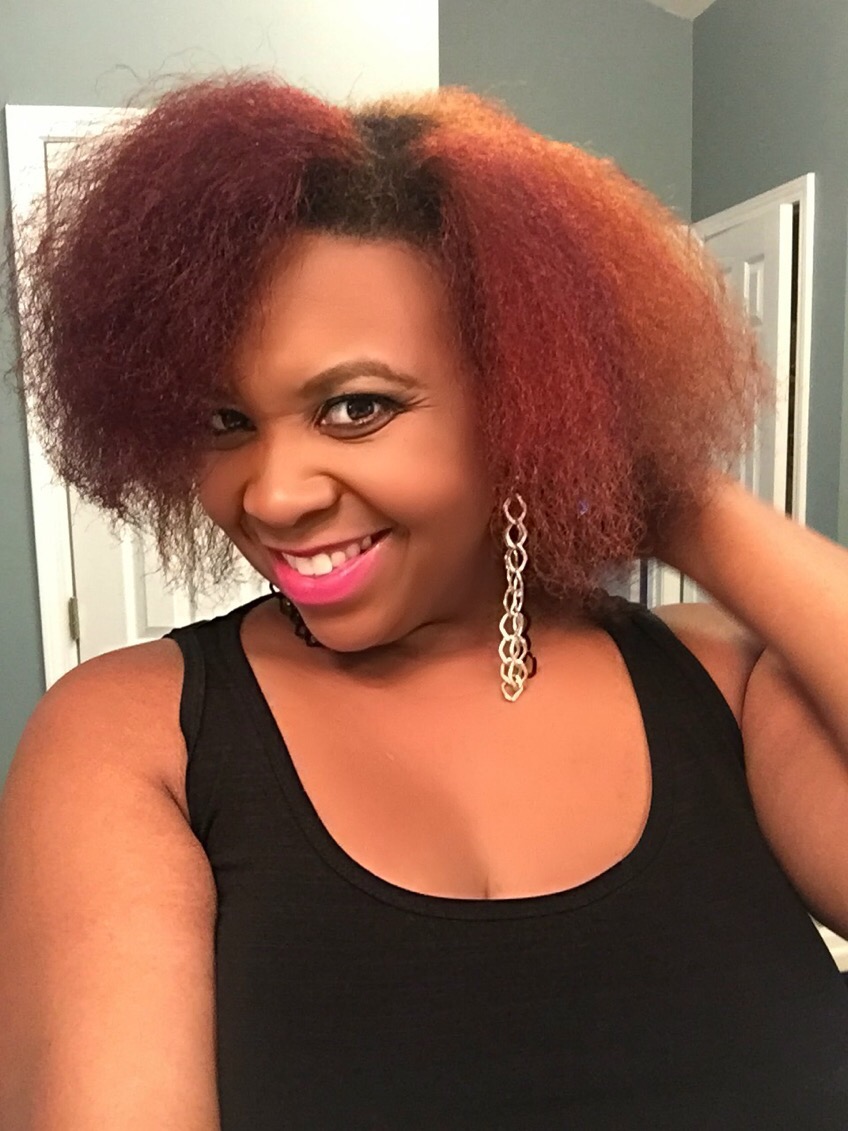
In the morning when I’m ready to style my hair, I untwist my hair and take down the ponytail. My roots are now nice and stretched. I use my Detangler brush to further smooth out and disrupt any curl patterns.


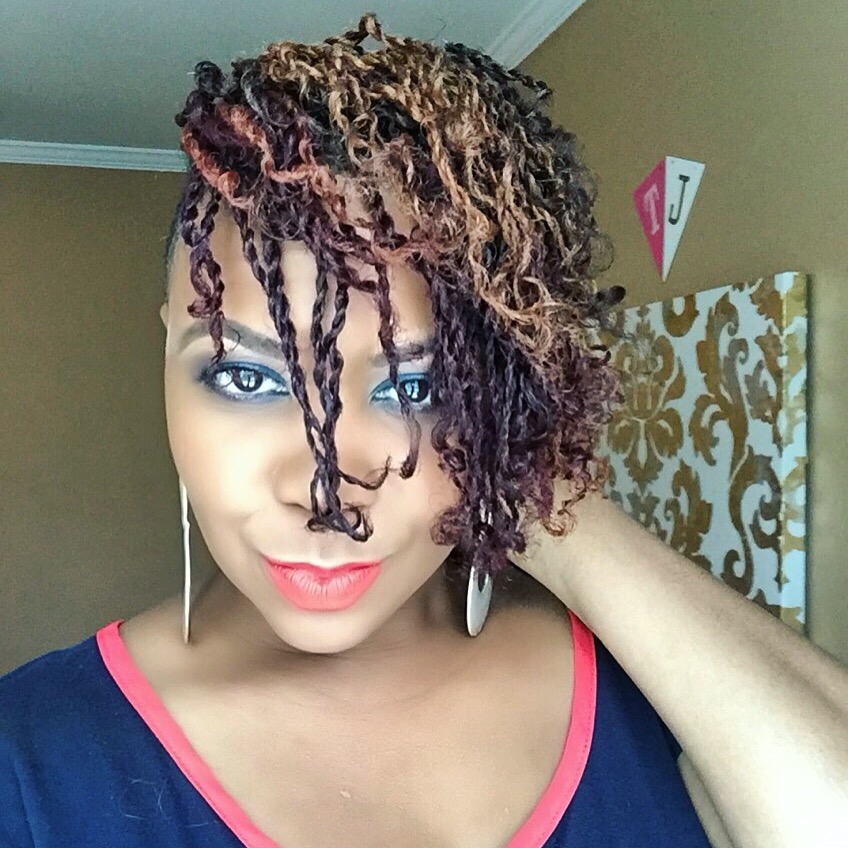
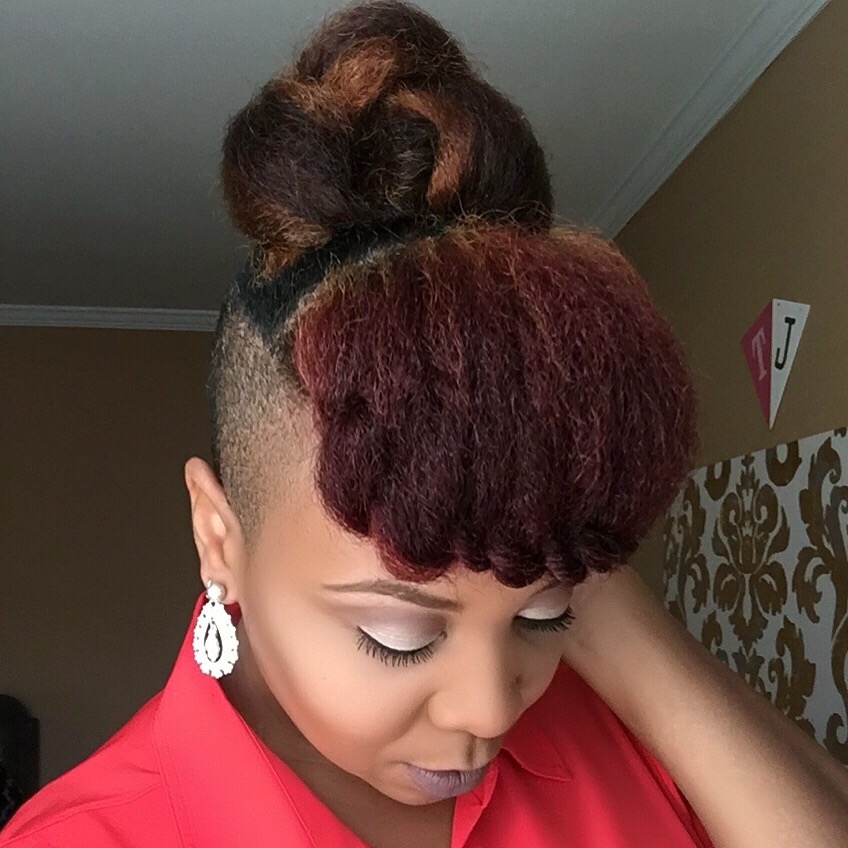
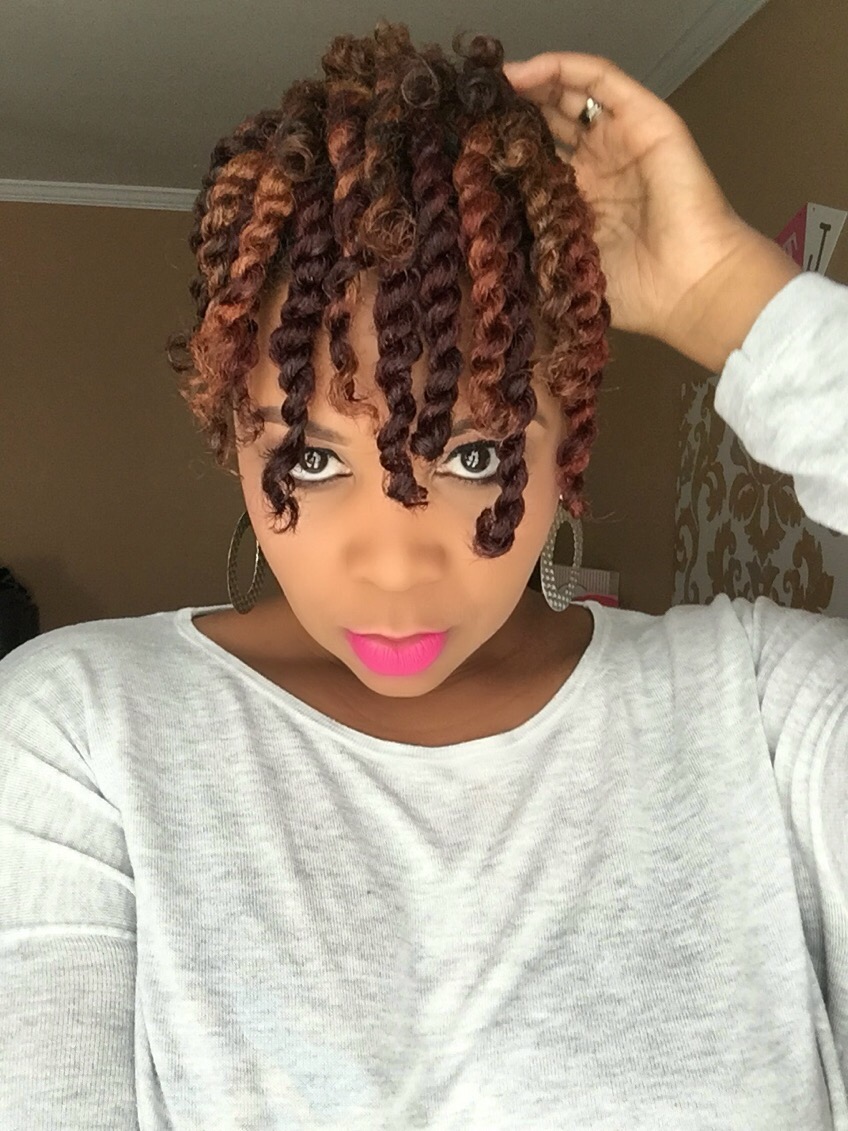
After I smooth the hair out its stretched enough for my to style my hair without any true curl definition. There is still plenty of texture for me to style with but no curls to disrupt my creative efforts.


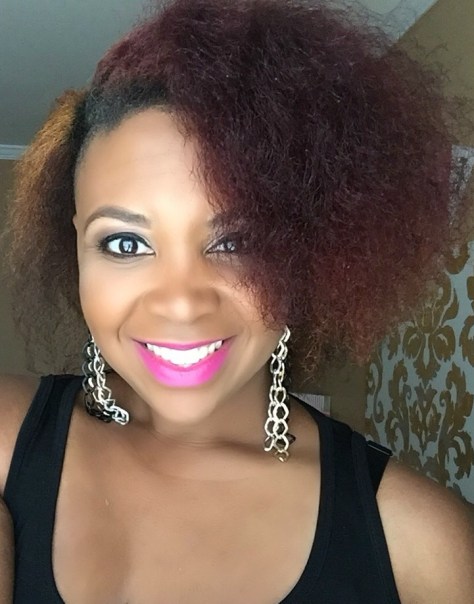
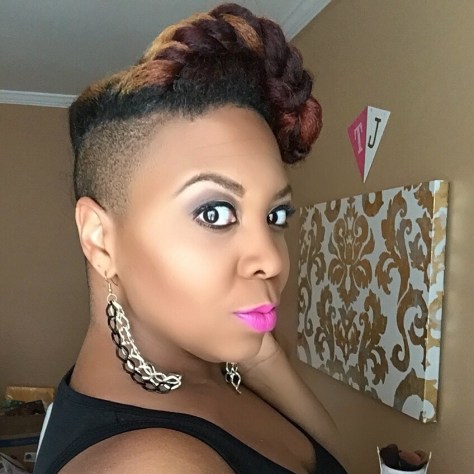
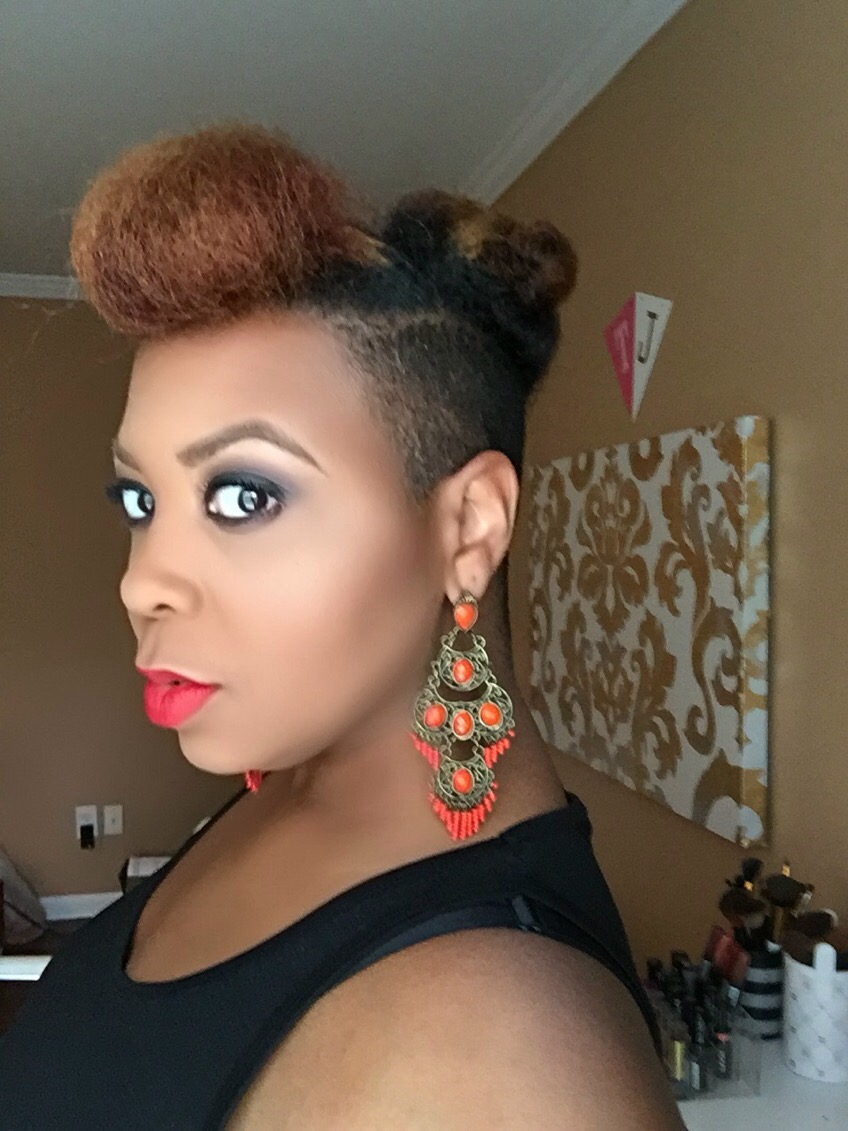
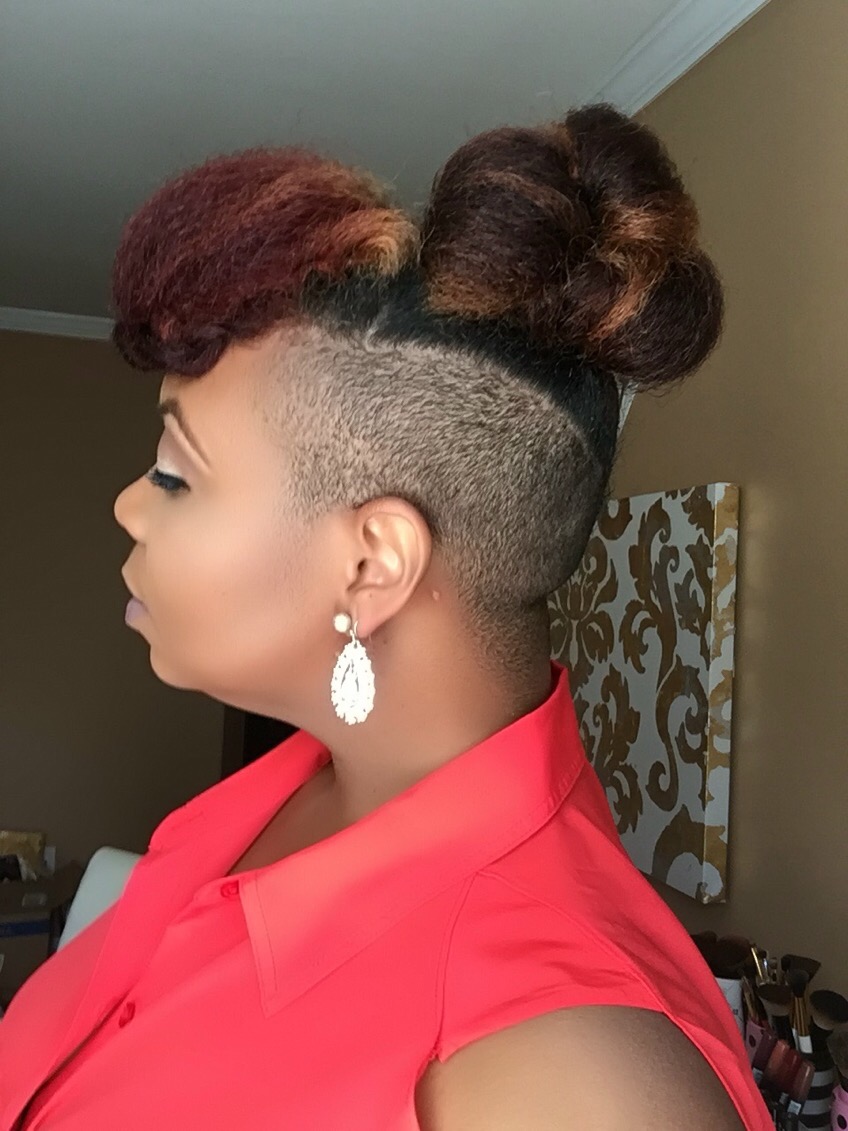
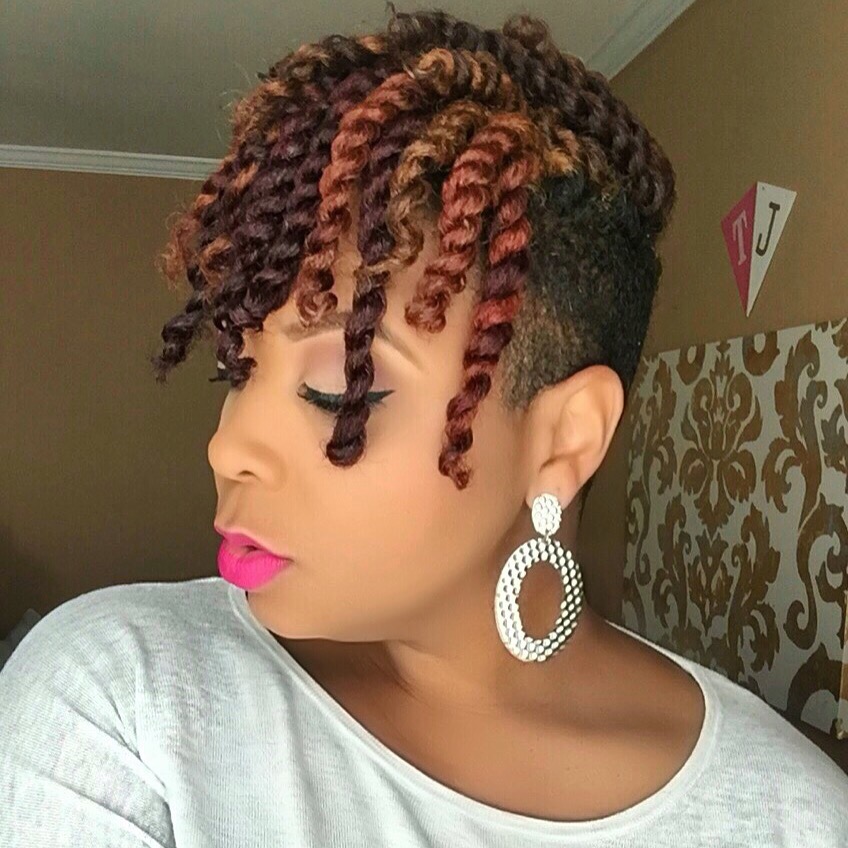
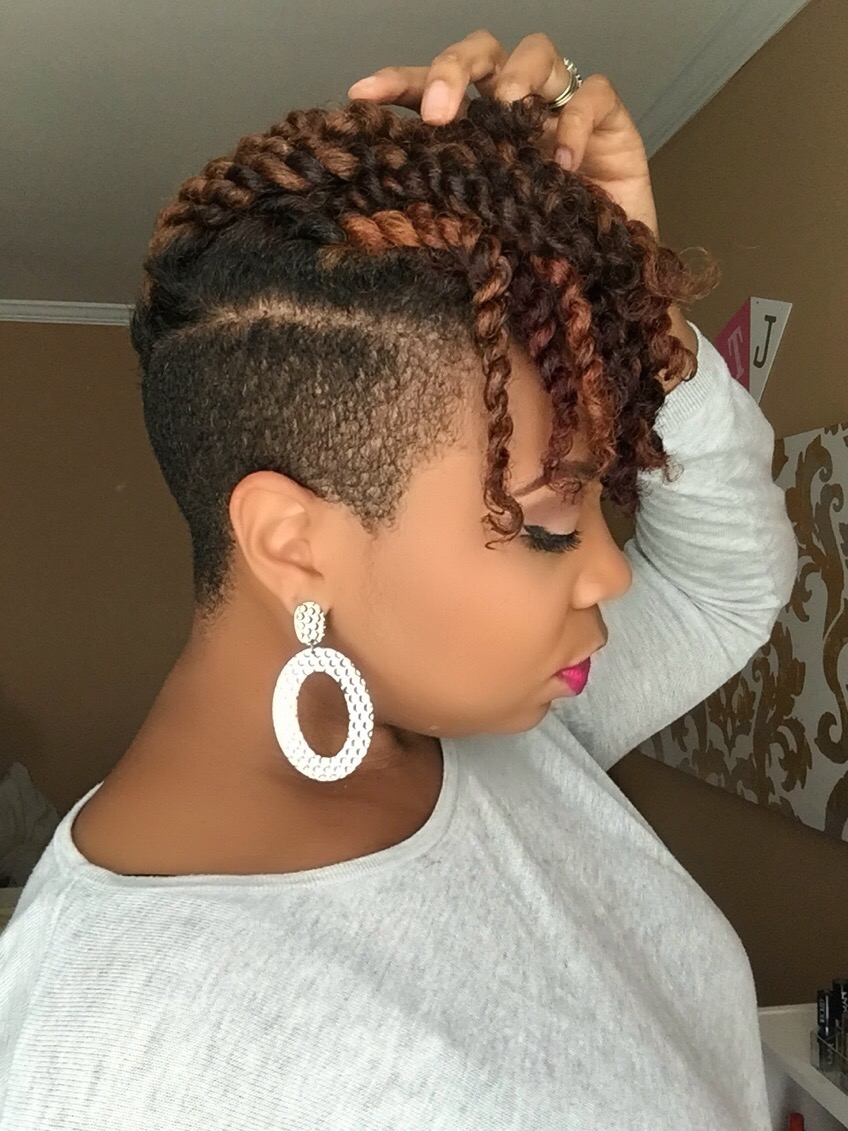
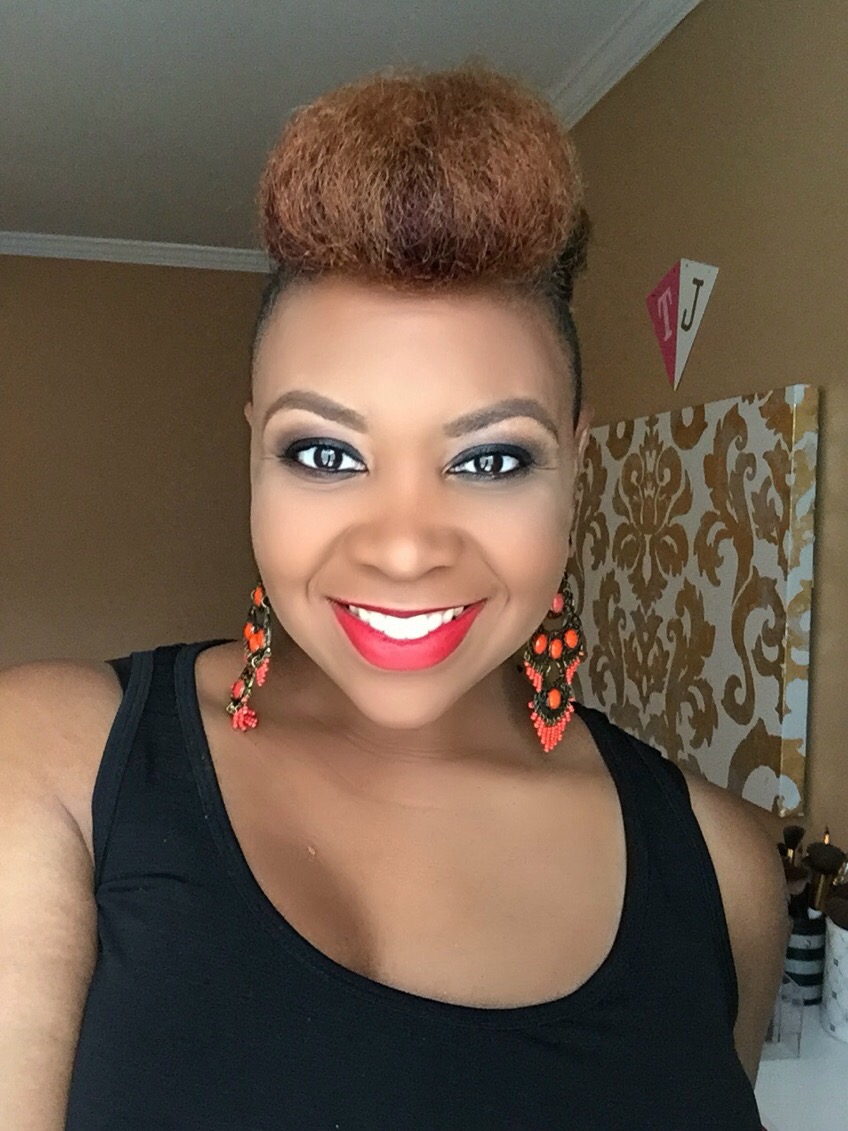
With my now stretched hair I’m able to very easily manipulate my hair and create a nice twisted updo. Here is my stretched style from yesterday


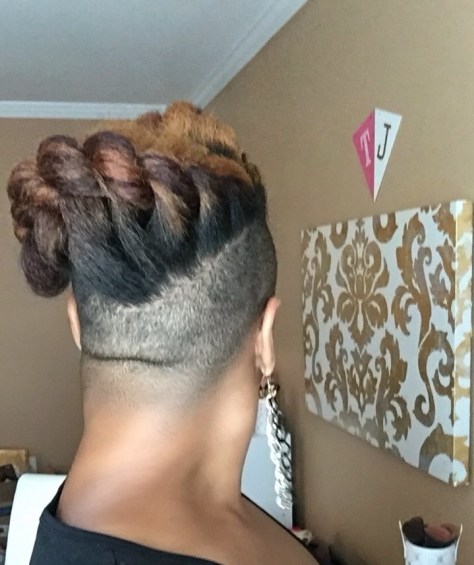
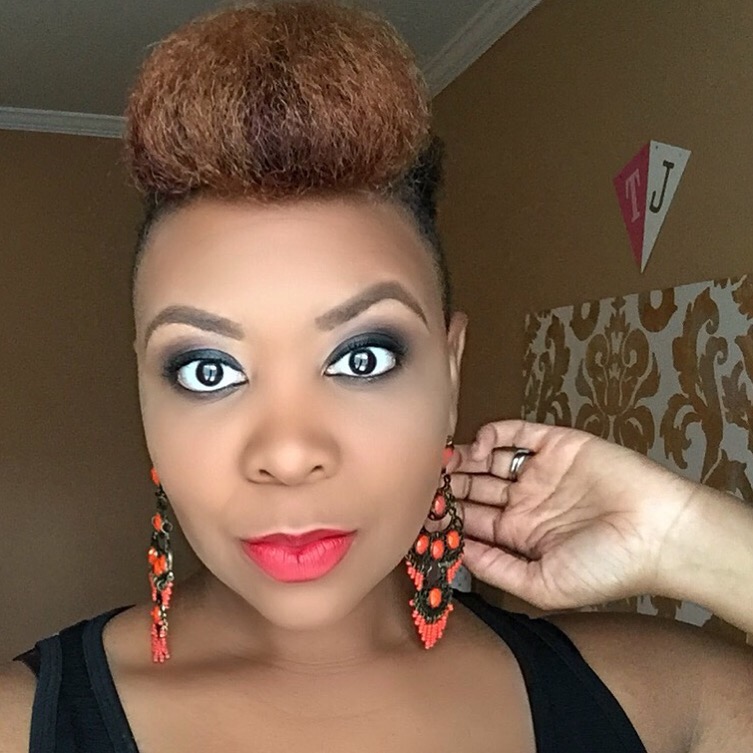
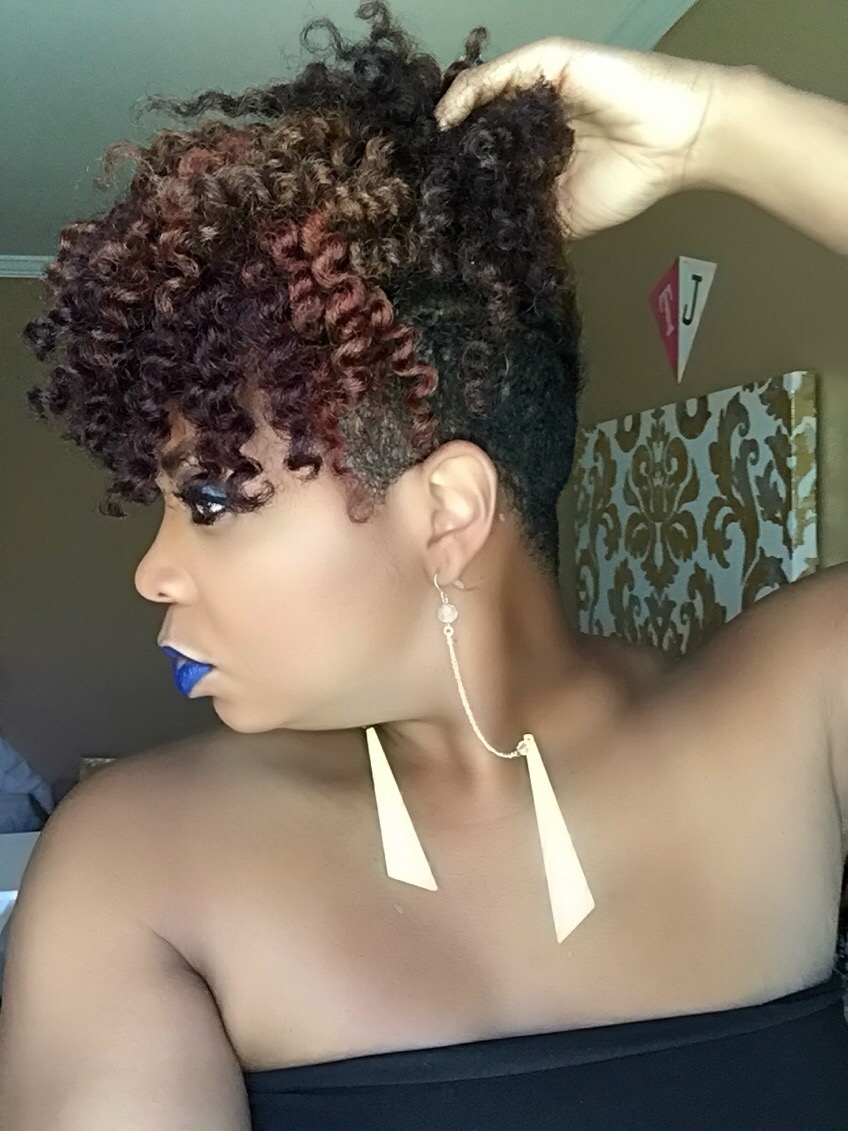
At the end of the day I took my hair down and smoothed it out with my Detangler Brush and it stretched even more.


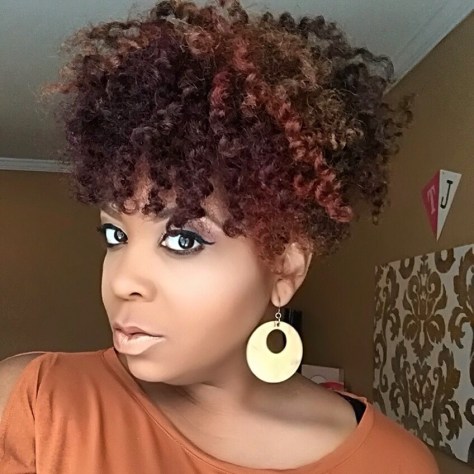
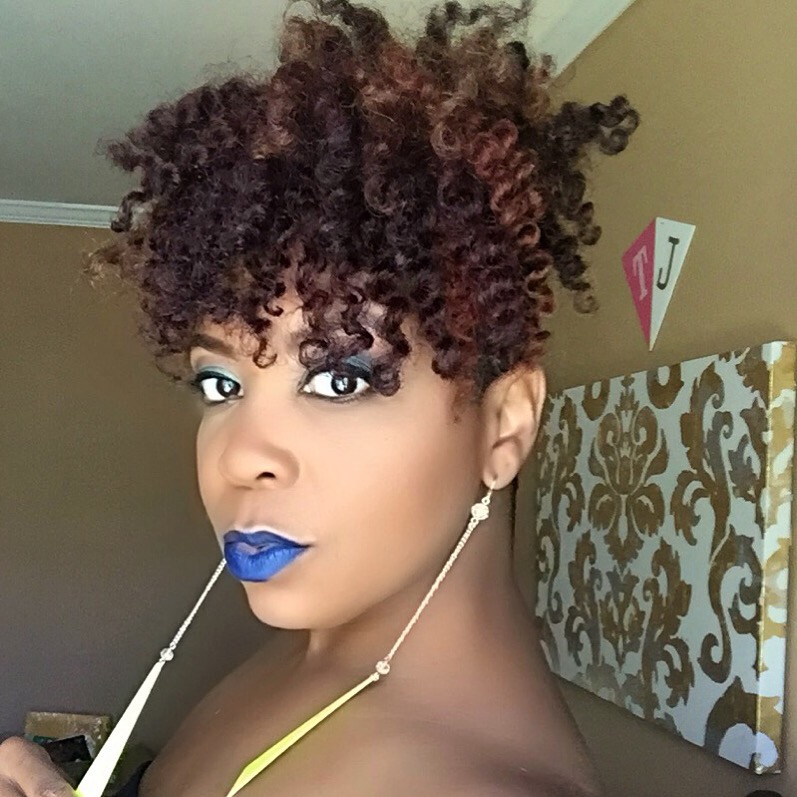
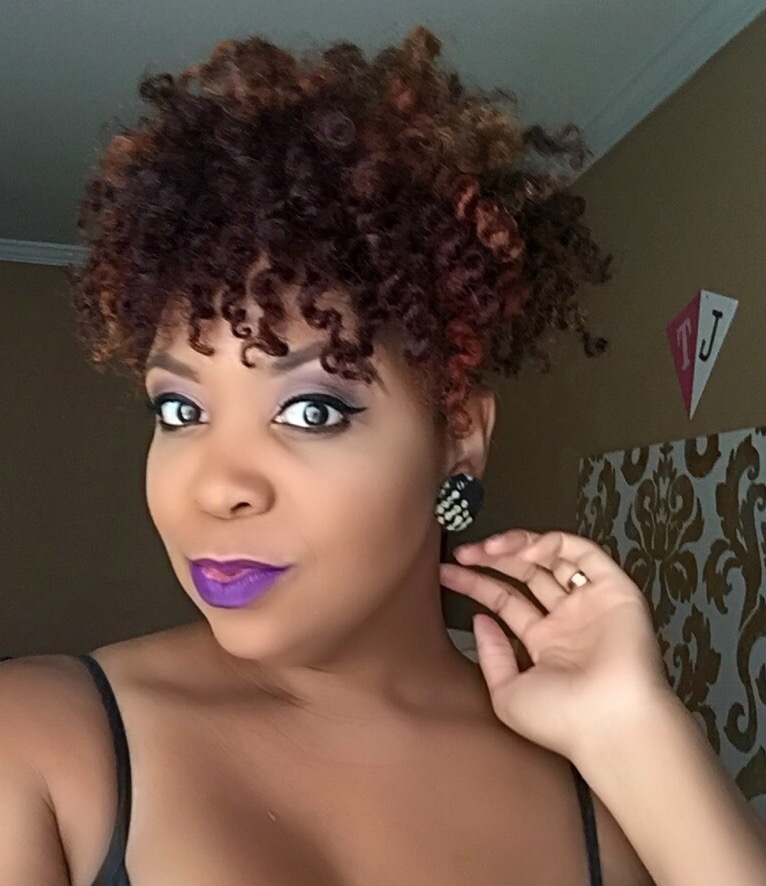
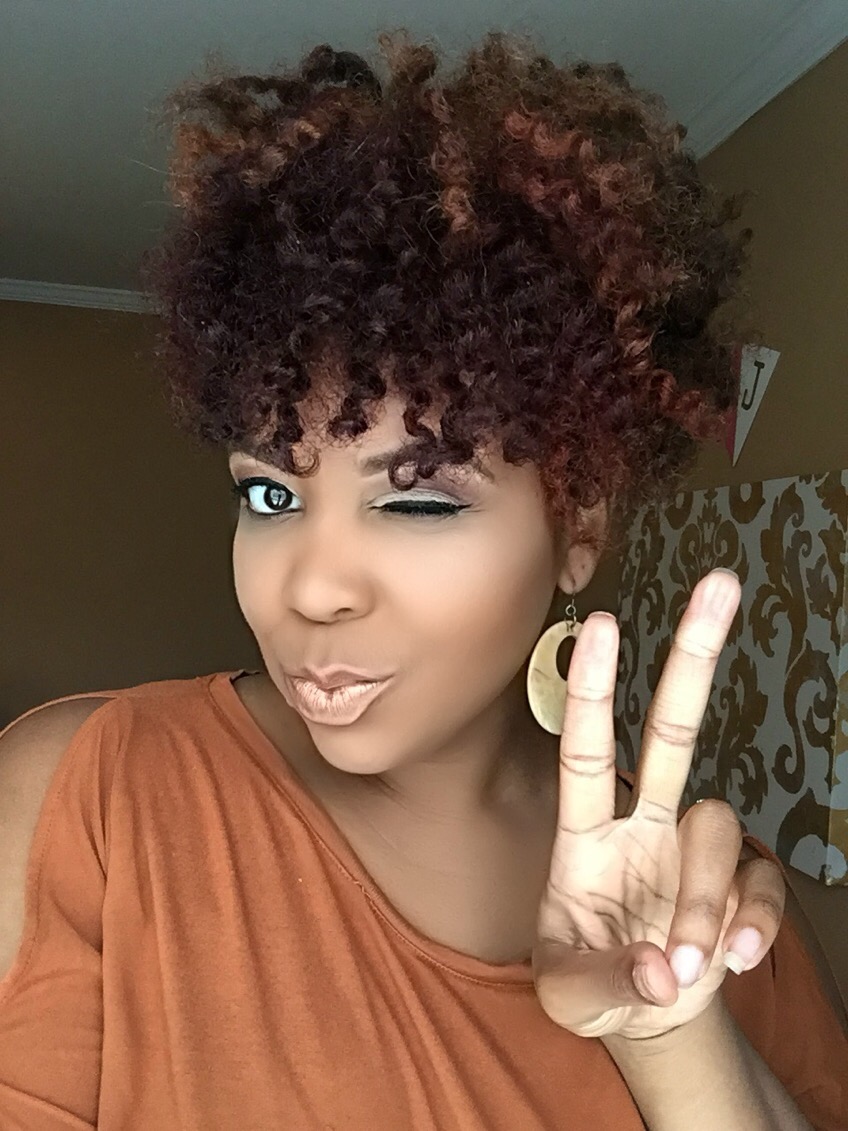
And to think, just the day before I had a head full of curls!

This process is easy, provides great moisture, allows for styling versatility over a short period of time and provides more opportunity for creative styling.

CWK Girls offers the Stretch Plates that also allows you to stretch your hair family easily.  I haven’t tried them yet but you can check them out here.

XOXO,

TJ


Spring Makeup Look

Good morning beauties❤️

Today I’ve got a vibrant spring time makeup look to share with you all. Spring is almost at its end but this look can easily transition over to summer. It’s a blue eyeshadow and pink lip combination.


I love these colors together. The hair is the same twist out I talked about yesterday. You can check out that post here if you missed it.

If you’re interested in the deets on this super fun spring look click here

XOXO

~TJ


3 Day Twist Out Bliss

Happy Monday luvs,

I hope you all had a great Mother’s Day Weekend. Mine was great, but more on that later. I decided to go with a twist out this weekend for the simple fact that it’s quick easy and super cute. 

I used one of my absolute favorite product lines for moisture, OGX Quenching Coconut Curls.

  
These products are so rich in moisture and my hair LOVES them. I cleansed and conditioned my hair with the shampoo & conditioner and then applied the Coconut Milk Anti Beakage Serum. I love using this product to help lock in moisture.

  
Next I installed medium size twists using the Curling Hair Butter. This product has a lot of slip and feels really good on my hair.

  
About these twists though, so much life!! With my new much needed cut, which you can read more about here, they were the perfect length to pull forward. 


The next day after applying a little extra coconut milk, I unraveled these bomb twists for my day 1 twist out. Nice definition and a decent amount of texture for day 1. Ya’ll know I love lots of texture! 


Day 2 Was similar to day 1, but had a bit more texture.
  
And day 3 is my favorite day for texture. It’s just bigger and better! 


OGX Curling Hair Butter is pretty much my go to for twist outs these days.

  
 If you haven’t tried this line of products I definitely recommend it.

  
XOXO

~TJ